
Getting started with IPPC Ledger
Enter, attach, correct, export: how your first records get into the application.
01 Log in
You receive an invitation by e-mail. Its link lets you set your password; then log in with your e-mail address. The start page shows a checklist of the first steps.
02 Add a supplier
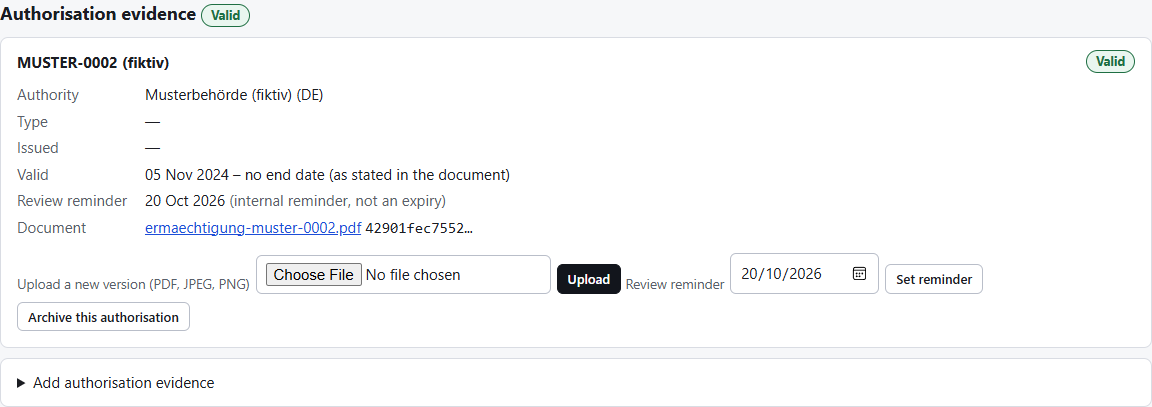
Suppliers → Add supplier. Below, “Add authorisation evidence”: number and authority from the authorisation, a validity only if the document states one, and the PDF or photo.
Example with fictional data 03 Record a delivery
Deliveries → Add delivery: receipt date, supplier, delivery-note number, treatment method and details, and per material line the wood type, a quantity with its unit and/or the mass in kg. Upload the delivery note and treatment evidence right away.
04 See and fix what is missing
If something is missing, the delivery shows the reason. “Missing Evidence” lists everything open. Under “Review / verify” you mark documents as reviewed or rejected.

Example with fictional data 05 Correct
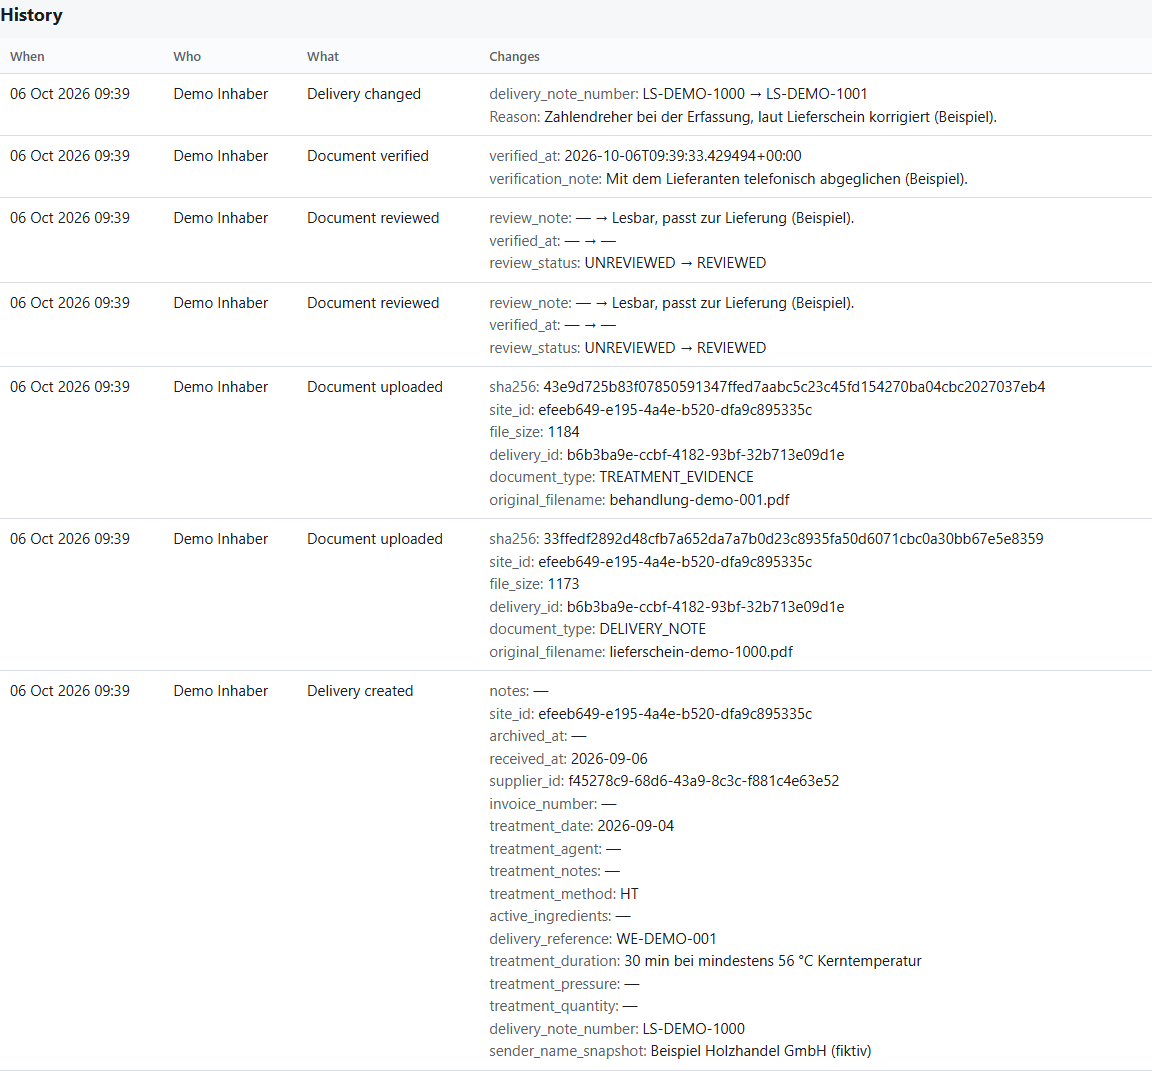
Edit on the delivery. When you change a recorded value, give the reason; the history shows the old and new value, person, time and reason.
Example with fictional data 06 Link to a job
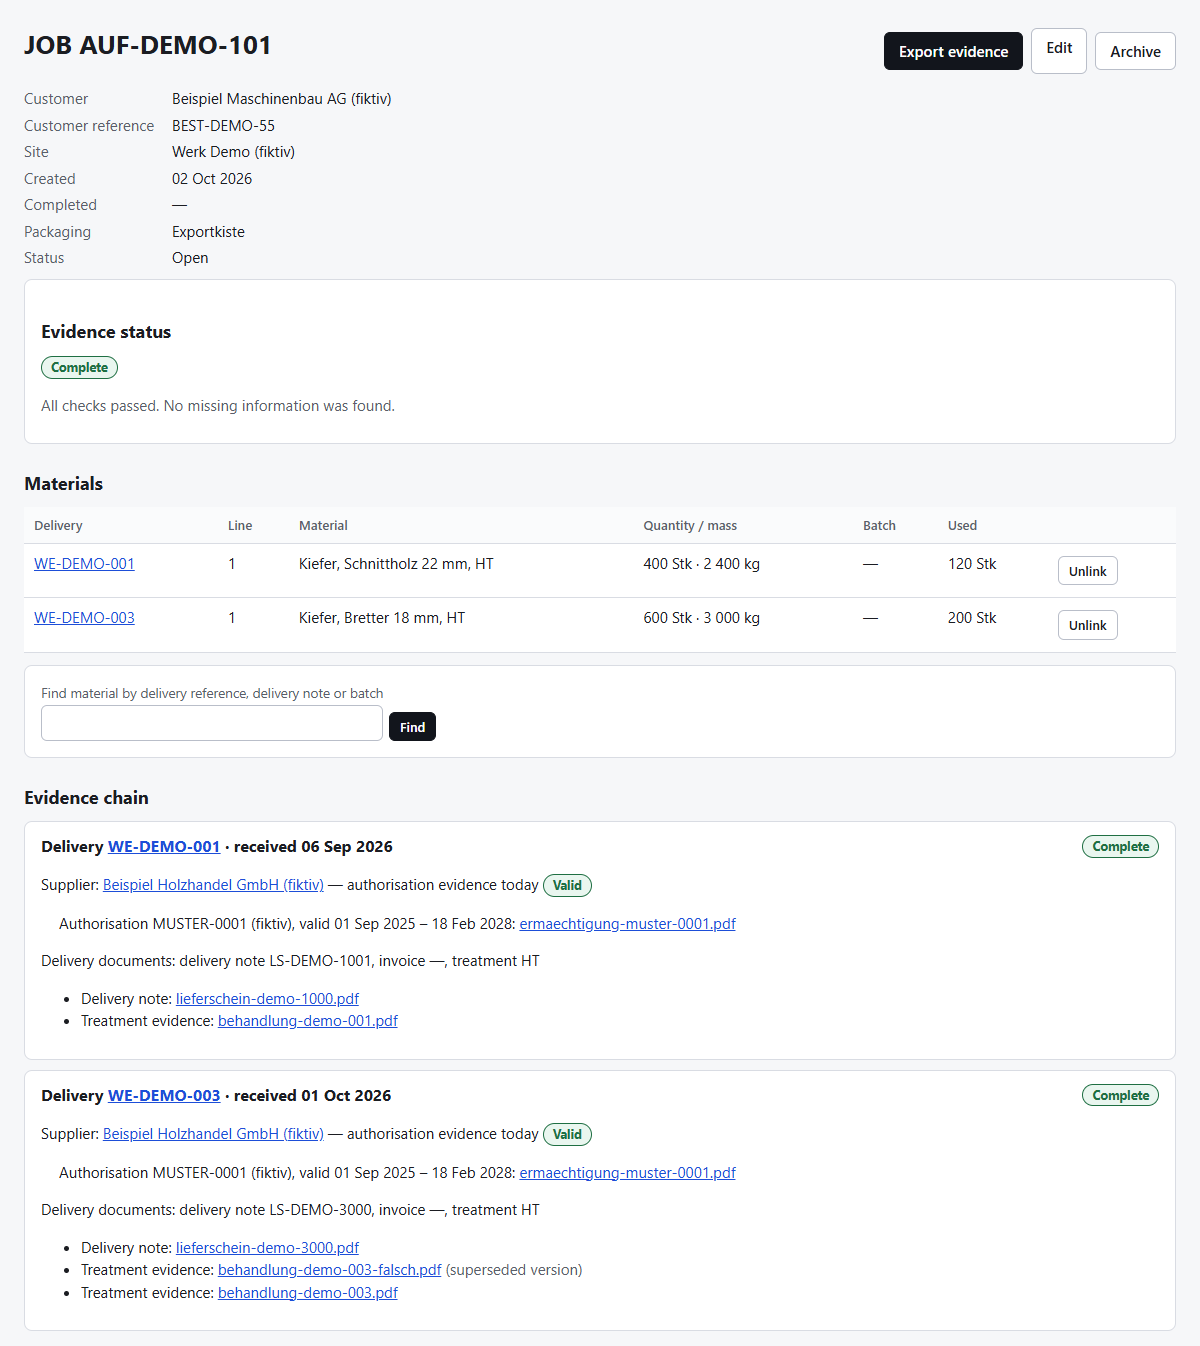
Jobs → Add job, then find material by delivery reference and link it with the quantity used, in the delivery's unit.
Example with fictional data 07 Export
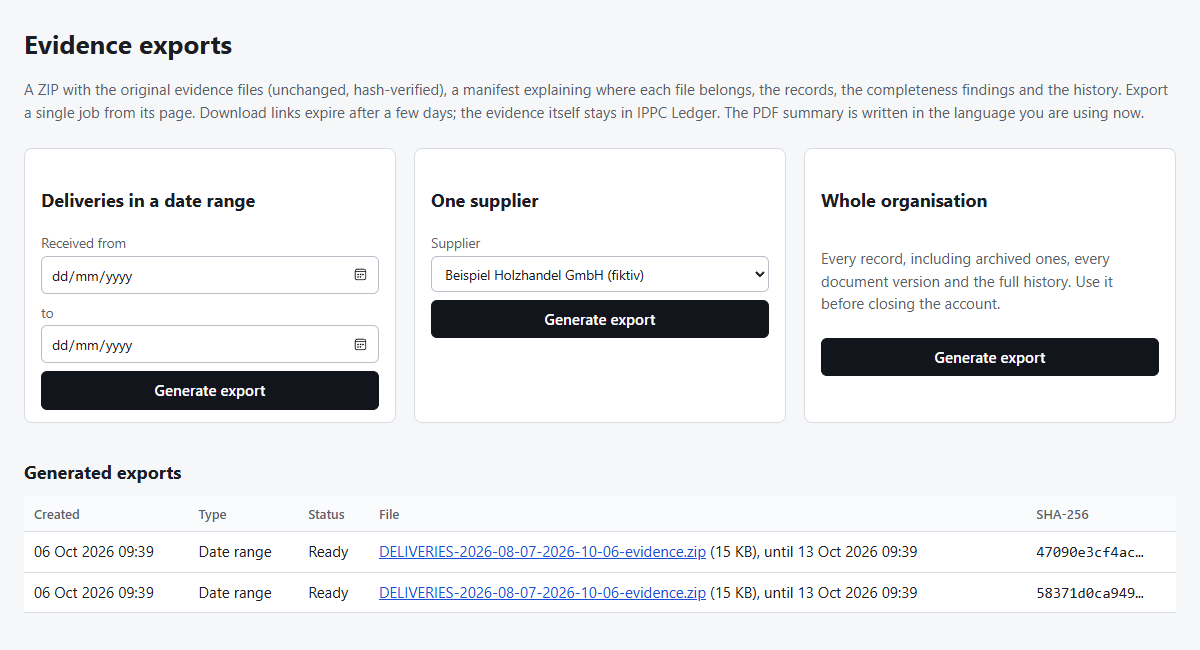
“Export evidence” on a job, or Exports → a period. A period without deliveries gives a message instead of an empty archive.
Example with fictional data 08 Bring spreadsheets
Settings → Import: download a template, fill it in, upload, check the columns, review the preview, confirm. Dates with slashes (05/03/2026) are refused as ambiguous; write 05.03.2026.
Questions? logicalknight0@gmail.com · Back to IPPC Ledger